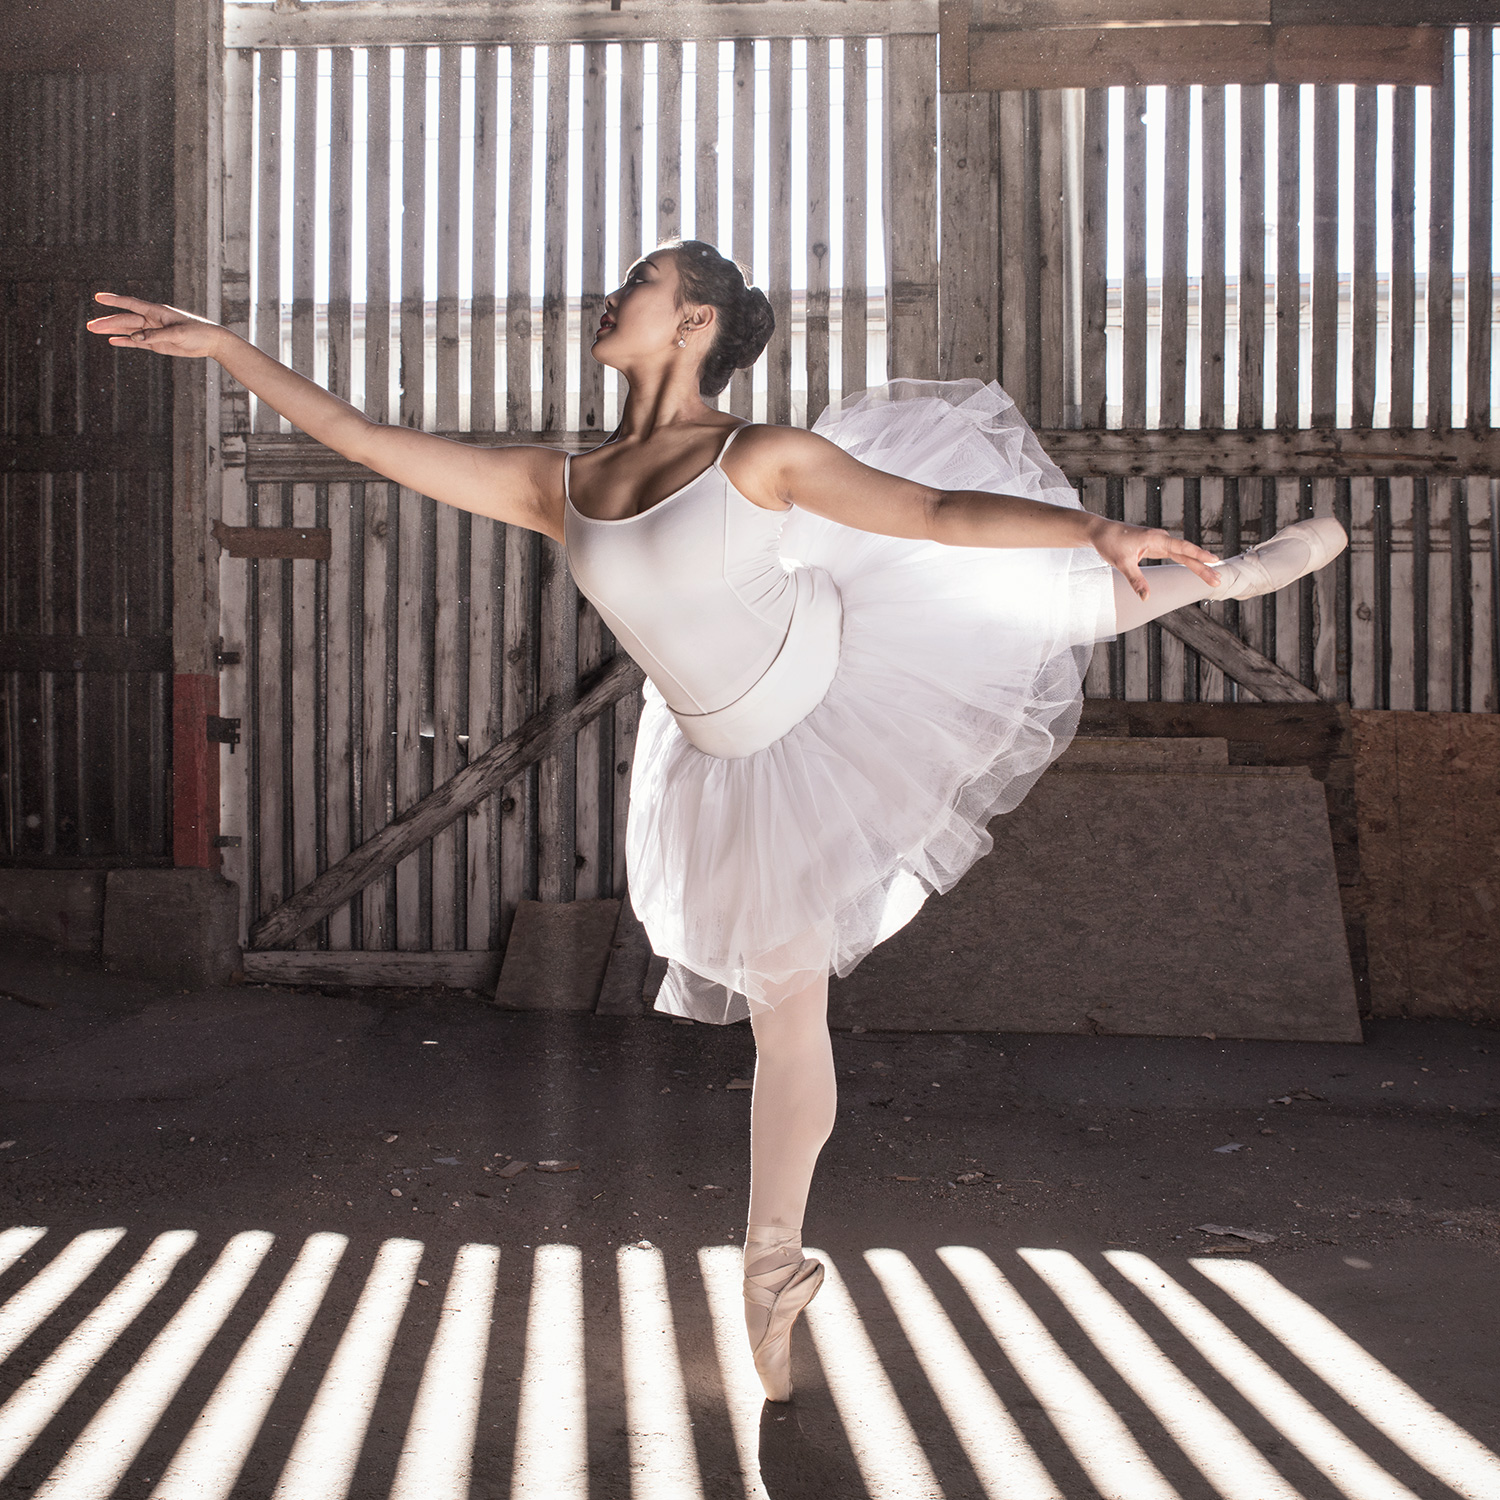
Phothoshop

Ballet meets Dia de los Muertos

My team and I just finished an incredible shoot last week and I wanted to share the results with you. We were able to shoot at a beautiful location in Colorado Springs (abandoned locations are by far my favorite type of backdrop). If you add in 3 amazing dancers, 2 very talented MUA's (Tasha Ditchman and Molly Hardee) on site working all day, assistants and lots of lighting, you get some pretty awesome stuff.

Below you'll find the BTS video (Filmed and Edited by Andrew Forrer) to give you an idea how much work goes into a shoot like this, and some of the images that we ended with.

Thanks to my incredible team and I hope this inspires you to dream big...now, go be awesome!

DOD_Ballet_Photo
DOD_Ballet_Dancer_Movement
DOD_Ballet_Dancer_Photo
Ballet_Dancers_Industrial_Photo
Ballet_Dancer_Industrial_Sun
Ballet_Dancer_Industrial_Sun_2
Ballet_Dancer_Industrial_Sun_3
Ballet_Dancer_1
Ballet_Dancer_2


Personal Project - The Dolls

A while ago I did a personal project called "The Dolls Have Eyes". I had originally shown these on my old blog but that has been taken down so I wanted to put them up on the new page for you guys to see!

The idea was relatively simple, take pictures of dolls and morph them together with human features. What I wanted to see was if people could tell, if they knew they were looking at a doll with some real feature. It's my exploration of how a lot of what we see in media today isn't real at all, and if it seems to good to be perfect to be true it probably is! 

Hope you enjoy it, or you think it's creepy...either one :) Until next time, be awesome!

Re-Banding: Hydrogen Skyline

You've heard of re-branding before...well this is kind of like that. A little white ago I sat down with the band Hydrogen Skyline (www.hydrogenskyline.com) and talked to them about creating a new image for their band. I wanted to share in this blog what came from that collaboration and a little behind the scenes at some of the composite work I did.

Before I get to the images I wanted to take a second to talk about collaboration and a couple of things to help you get started!

1. Bring something to the table - We literally sat around a table at a coffee shop when talking about this project and everyone brought their ideas to share. Don't be the person in a collaboration to show up to the table empty handed, bring ideas, bring good juju, bring something!

2. Be Flexible - Don't bring ideas that are not flexible to the table and be willing to have ideas shot down, especially to meet the needs of the client. We all think our ideas are the best ideas, it is an unfortunate truth that a lot of times they aren't...but that's why you collaborate, so if your ideas suck someone can help make them un-suck.

3. Do your homework - The other day I sat down to have a meeting with a potential client and they hadn't even looked at my website, they had just heard I was good. Not only was it insulting to me, but it was a waste of time because they didn't know what I specialized in. Before I met with the band I had looked at other band album covers, seen what was popular in their genre, and come up with ideas that would work for both of us...they had done the same. Don't be too cool for research and homework, you're clients will appreciate it!

Alright, enough tips...let's look at some pictures! Hang on for the last one it will show an animation of the composite.

Aaron_Anderson_Photo_Hydrogen_Skyline_Animation

Until next time, go collaborate with someone and BE AWESOME!

3 Things

When I first started photography I wasn't good...and I think that's the case with a lot of people.  However, there were a few things that really launched me in a different direction and I wanted to share those with you.

1. Shoot in RAW

If you're just getting started in photography you probably don't even know what I'm talking about, and no, it's not a vegan diet. RAW is a file format that your camera puts out instead of a JPEG. You can usually do both, but I would recommend getting used to just shooting RAW. If you aren't shooting in RAW now I would encourage you to learn not only what it is, but also how to work with them. In a nutshell RAW images contain a MASSIVE amount of information that JPEGS throw away, and it enables you to make larger changes later on.

I remember when my good friend Zak took me out to shoot about 7 years ago and he asked me if I shot in RAW, I looked at him like he was speaking a different language. It was on that day that I switched over and then learned what the heck he was talking about, it was the beginning of the journey for me.

2. Start Learning Lighting

It all started with a reflector. I think it was about 6 years or so ago that I bought my first reflector, and I was blown away! I thought most certainly that my images would be on the cover of Vogue any day (not even close!). Once I started getting more serious I bought an off-camera flash and have now used most lights on the market, from Profoto to Elinchrom and Broncolor to Alien Bees. I think lighting and use of lighting is one of the main things that separates the pro's from the amateurs. So start with a reflector, learn how to use it, and then the skies the limit!

3. Learn How to Edit Your Images

I use Photoshop, a lot. In fact I have even retouched for massive companies like Ariat, Tazo, Coca-Cola and more because I like it so much. Obviously you don't need to become a retoucher to edit your own photos, but I think a lot of people skip this step because cameras are digital now. If you are thinking about becoming a professional photographer you need to at least know the basics of editing photos, just like you would need to have known the basics of how to use a dark room back in the day.

If you're looking at all these things and feeling a little overwhelmed, there are lots of great resources to get you started. Places like Lynda.com, Phlearn.com, and Kelbyone.com are just a few that I've seen that offer great tutorials on everything from using your camera, lighting and handling files. I learned most of the foundations from Lynda.com, then I mixed that with school, a lot of terrible photos, books, and internships, that is how I became what I am today.

Finally I wanted to say this; when you're new it's ok to suck, but in order to grow past that you'll need to invest time to keep growing...then one day it will all click, and you'll get it! So check out this video for inspiration and then go be awesome!

I think it was in the time of spring 2012, when I came across David Shiyang Liu's lovely piece of work about Ira Glass. It was the most inspiring and motivating video I had ever seen in my life. I watched it over and over again, listened to Ira Glass' voice, and told myself, that I am not the only person who is constantly disappointed about the gap between one's taste and one's skills. Later in 2012, I decided to do my own filmed version of Ira's interview - using my own language to tell his message. It took me about a year from concept to upload. I made it for myself and for anybody who is in doubt about his/her creative career. I also think that Ira Glass' message isn't only limited to the creative industry. It can be applied to everyone who starts out in a new environment and is willing to improve. THANK YOU Ira Glass, whom I've never met in real life, but who had such a big influence on my development. Thank you for telling beginners what nobody else does. David Shiyang Liu for the video that inspired me to start the project. You all should watch his awesome kineticTypo-version here: http://vimeo.com/24715531 The people from current.tv who originally recorded the interview with Ira Glass. See the relevant part here: http://www.youtube.com/watch?v=BI23U7U2aUY The people from Magic Lantern who gave DSLR videography a new dimension (I chose this project to be a test run with the RAW plugin)! Steven Sasseville for painting the "taste" painting for me. Pedro Sousa for his advice and working his ass off at the "creative work" chalkboard. Wolfgang Kraus for letting me borrow his sound equipment. Kai Löhnert for working out on his birthday in the "fight" take. Wolfgang Hendrik Schnabel for giving me the museum-like atmosphere and his silhouette in the painting takes. Hermiyas Ötztürk for his hairy "good enough" hand. Orange Hive Studio for light equipment and location. Mima and Heinz Sax-Schmitz for the location of the "ambitions" take and finding me the "finish 1 story" typewriter. Joyce Chen (https://vimeo.com/clownmori), Soufiane Mabrouki (http://vimeo.com/user21466567), Damien Tsenkoff (https://www.behance.net/damtsnkff), Nikita Samutin (www.baselinedesign.ru) and Andrej Mikula (http://amara.org/en/profiles/profile/65015/) for taking the time and patience to create Chinese, Arabic, French, Russian and Slovak subtitles and dissolving language barriers to make even more people understand Ira's words. A SPECIAL THANK YOU Solveig Gold for being the most patient and supporting person in my life. She appears in a lot of scenes in this video. Jutta and Uwe Sax for several pieces of equipment and their support.


Why Landscapes are important.

I wanted to take a moment to talk about Landscape photography, which you will notice is not in my portfolio...sort of. I think one of the things you need in photography is an outlet, something you like to do that you may not end up making money off of, something that has no clients and no rules, that you do just for you. In my case that's Landscape Photography. When I go out to shoot landscapes I get to do whatever I want, and I don't have to think about what other people will want out of the photo I am taking. Sometimes people like them, and that's great, but that's not the point.

There is one more benefit to Landscape Photography that I wanted to mention for all of you photographers out there who want to do composite imagery...having landscapes in your library is VERY helpful! A lot of the time I don't actually need to go anywhere to shoot a background for an image, I already have it sitting on my computer.

Below are some examples of my landscapes...I highly recommend finding something you love to do that doesn't have anything to do with clients or work and implement it into your work flow. Until next time, be awesome!

Pathing and Quick Select Part 2 - Edges

So this is where the rubber meets the road, literally. If you spend all the time in the world pathing and using quick select tools but the edges aren't right your picture will look weird. Sometimes people won't even be able to tell you what's wrong, it will just "feel" wrong. Here's a couple cool tricks to get those edges looking snazzy!

First you need to turn your path into a mask which you can do a couple of ways. If your path is currently active you can just hit Cmnd or Ctrl Enter to turn it into a selection. If your path is not active then you can just hold down Cmnd or Ctrl on your keyboard and click the path with your mouse, either way works, but now your path is a selection. With your new selection active hit Shift + F6 and feather your edge by .5 pixels (you can also find it in the dropdown menu Select > Modify > Feather). Once you've feathered your selection click the create new layer mask icon and you will have your initial mask.

I am going to pause really quick and tell you that I came up with .5 pixels for my initial mask based on personal experience, no feather at all looks too hard and 1 pixel can make some edges too soft depending on the subject...play around and find the perfect setting for you!

Wouldn't it be nice it that's all you needed to do after an hour of pathing? I do to, but it's not! This is where a lot of people go wrong, they just leave the person/object with hard edges and continue on. Sometimes this will work, but I have found that those occasions are rare. Granted, you will leave some of the edges hard, but you'll want to make visual decisions for the rest.

Look at your subject and see if it feels correct. I always have another person look at it as well, sometimes I am just too married to the picture to be objective. Now, if you have some edges that look hard here's what you do:

1. Click on your mask so that it's selected

2. Use the lasso tool to circle the edge that you think is too hard

3. Feather your selection by 25 pixels (again you will want to play with this). This step is to make sure your new edge will blend into the old edge.

4. Click Filter > Blur > Gaussian Blur

This is a really cool way for you to see what you're doing to the mask, believe it or not the feather and Gaussian blur use the same technique but the Gaussian Blur allows you to see what you're doing! TIP: If you don't see what you're doing make sure the "Preview" box is checked.  Here is a before and after on a mask so you can see what it should look like!

BEFORE

BEFORE

AFTER

AFTER

You can see the blur just below the neck, it is subtle, and it should be! It is the subtle touches that mean the most! I am working on some video tutorials for the future so stay tuned and I'll be releasing new images, series and behind the scenes soon! Until next time...be awesome!